If you go shopping for Brushless motors you will be confronted with a lot of numbers to choose. For an example, you would see motors marked with 3632 22turn 1500Kv, 2213 20turn 920Kv etc. So what does all those numbers mean, and how would you choose? Here's a simple guide...
Let's take this motor for an example,
It's marked as "2213 20turn 1050Kv Outrunner". Let's see what it means.
First of all, it's clearly written that this is an Outrunner motor.
The "2213" indicates the size of the stator,
First two numbers = diameter of the stator = 22mm
Second two numbers = length of the stator stack = 13mm
The "20turn" denotes the number of windings
Finally, there is the "Kv" rating.
Kv is the motors velocity constant. It is measured in RPM per Volt.
In simple terms, a 1050Kv motor running on 3S (11.1V) will produce
= 1050 x 11.1 = 11655rpm
Remember never to confuse the Kv rating of a brushless motor to "Kilovolt"!
So, what to choose with all these...
Normally, the larger the size of the stator, more the power the motor will generate.
The number of windings will determine the RPM and the current capacity. The lover the number of windings, the higher the RPM and the current capacity.
Choose these according to your requirements...
One thing to remember is that, although most manufacturers use this numbering method, it's not a standard. So, there may be some out there with different numbering. Just be aware when you buy...
Related posts:
What do the prop size numbers mean?
Related links:
http://aeroquad.com/wiki/index.php/Motors_and_Propellers_FAQ#What_do_all_those_numbers_on_the_outrunner_motors_mean.3F
http://en.wikipedia.org/wiki/Brushless_DC_electric_motor#Kv_rating
Let's take this motor for an example,
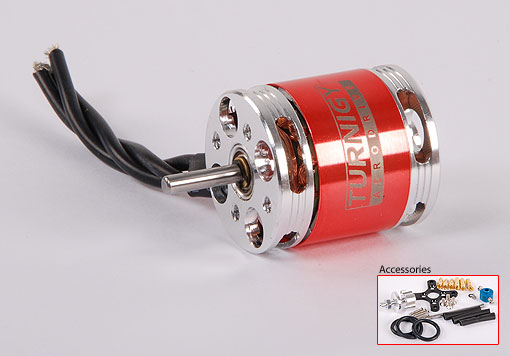 |
| Turnigy 2213 20turn 1050Kv Outrunner |
It's marked as "2213 20turn 1050Kv Outrunner". Let's see what it means.
First of all, it's clearly written that this is an Outrunner motor.
The "2213" indicates the size of the stator,
First two numbers = diameter of the stator = 22mm
Second two numbers = length of the stator stack = 13mm
The "20turn" denotes the number of windings
Finally, there is the "Kv" rating.
Kv is the motors velocity constant. It is measured in RPM per Volt.
In simple terms, a 1050Kv motor running on 3S (11.1V) will produce
= 1050 x 11.1 = 11655rpm
Remember never to confuse the Kv rating of a brushless motor to "Kilovolt"!
So, what to choose with all these...
Normally, the larger the size of the stator, more the power the motor will generate.
The number of windings will determine the RPM and the current capacity. The lover the number of windings, the higher the RPM and the current capacity.
Choose these according to your requirements...
One thing to remember is that, although most manufacturers use this numbering method, it's not a standard. So, there may be some out there with different numbering. Just be aware when you buy...
Related posts:
What do the prop size numbers mean?
Related links:
http://aeroquad.com/wiki/index.php/Motors_and_Propellers_FAQ#What_do_all_those_numbers_on_the_outrunner_motors_mean.3F
http://en.wikipedia.org/wiki/Brushless_DC_electric_motor#Kv_rating
good article. try and find some thrust data for these motors
ReplyDelete